Drop-In Anchors: Setting, Embedment and When a Different Anchor Is the Better Buy
A drop-in anchor is a short steel tube. Thread inside, wedge at the bottom. Drill, drop in, drive the wedge, and the top finishes level with the concrete.
Nothing protrudes. That is the whole appeal, and it is a real one. Strut, pipe supports, formwork ties, machinery feet, overhead track. Anywhere a bolt has to appear later and nothing can be left standing proud.
It is also the least forgiving anchor in common use.
Every promise it makes gets kept or broken inside a hole you cannot see, driven by a tool a lot of sites do not own. A wedge anchor forgives a slightly crooked hole. A screw anchor forgives a slightly small one. A drop-in anchor forgives very little, and it stays quiet about it.
So this guide stays on what you control. Internal expansion. The setting tool. Flush embedment in a thin slab. Where a drop-in belongs, and where another anchor is the better buy. Then drill size, and what decides a quotation.
One line to keep: a drop-in anchor holds because the hole was right, not because the bolt felt tight.
What a drop-in anchor actually is
Look at the drawing. A steel tube with a coarse internal thread running most of its length. Four slots cut up the working end. A tapered plug seated at the base, held by a light crimp or a paper collar.
That is the mechanism. No clip, no ferrule, no leaf. The expansion cone is the tube itself, opened by the plug.
The thread is internal, so buyers quote the thread, not the outside diameter. An M10 anchor takes M10 rod. The body around that thread is larger, and the drill is larger again. Confusing those three numbers is the first way a specification goes wrong.
Materials run from zinc-plated carbon steel through hot-dip galvanized to stainless. Zinc plating dominates indoor work. Stainless appears where the bore will see water, because a flush anchor leaves an open cup in the floor that collects everything.
What the part is good at: a flush finish with no head in the walkway, a removable connection that leaves a reusable thread behind, shim packs cut to length against a bolt that never moves, repeated bolting and unbolting of the same machine. Small footprint, no clip shoulder sticking out.
What it is bad at is everything before the bolt arrives. There is one chance to set it. Get the plug wrong and the anchor is scrap, and taking it out of a finished slab is a repair, not a removal.
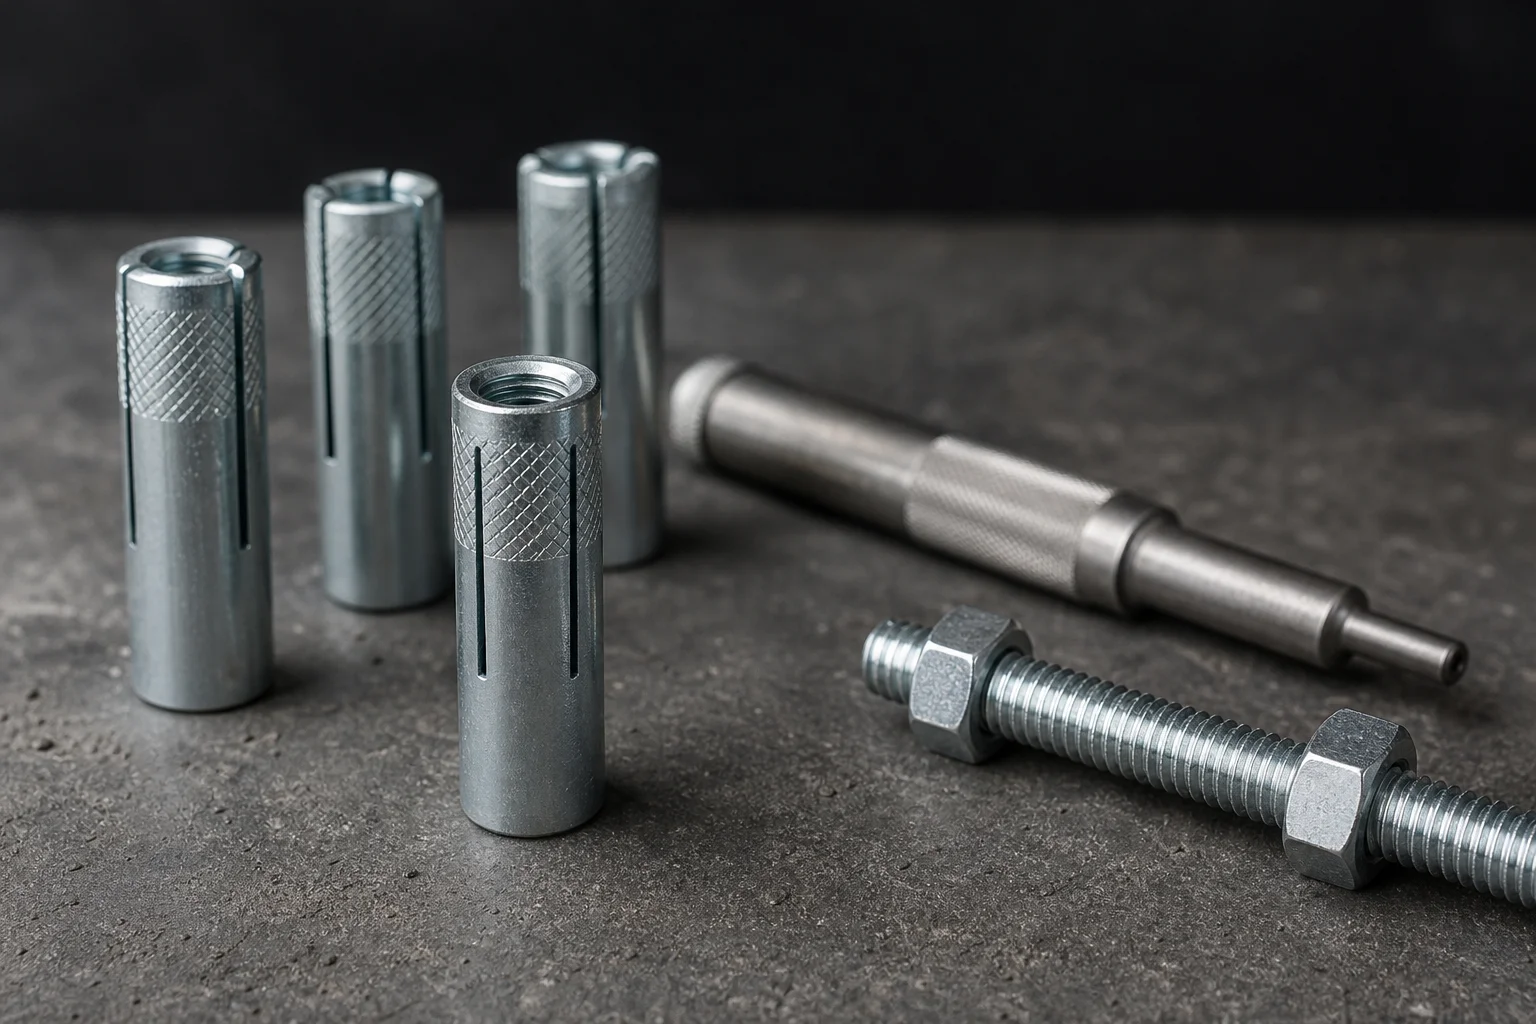
Drop-in anchors with the matching setting tool. The shouldered pin is not an accessory — it is the only thing that puts the plug at the right depth without rolling the thread.
How internal expansion works, and why the setting tool is not a punch
The plug is driven up into the slotted end. The slots open. The walls press outward on the concrete. Load runs from the rod, into the thread, out through the expanded walls, into the material around the hole.
Three conditions have to hold.
The hole has to be the right diameter. Expansion needs a gap small enough to close and wide enough to enter. Too wide and the plug travels without ever pressing hard. Too tight and the anchor will not seat, or the concrete splits as the walls open.
The plug has to reach the right depth. Short of it, the walls are half open. Past it, the plug bottoms in the slots and starts pushing the body back up the hole.
The blow has to go down the axis. Off-axis, the anchor tips, the thread ovalises, and the expansion is uneven around the circumference.
Now look at the tool. A hardened steel pin with a shoulder. The pin enters the bore and rests on the plug. The shoulder lands on the anchor rim. Strike the top and the plug travels until the shoulder stops it. That is depth control, built into the tool, for that anchor and that diameter.
A hammer and a punch do none of that.
A punch is narrower than the bore. It drifts, and it can roll a thread flank over, after which no bolt will start. It has no depth stop, so the operator judges by feel and sound. Some drive the plug too far. Some stop early because the anchor "felt tight".
So: a drop-in anchor that was set with a punch will hold until the first inspection. It may hold for years. It will hold right up to the day someone puts a torque wrench on it, or a proof load, or a bracket that actually carries the design load.
And note what setting is not. It is a displacement operation, not a torque operation. You are not tightening anything yet. Torque on the rod comes later, and it is a different number with a different purpose, covered in our note on bolt torque and clamp load.
Flush embedment and the shallow slab problem
Flush means the top of the anchor sits level with the concrete. Not proud, not recessed. Level, or a millimetre below.
That geometry has a consequence people miss. The whole anchor has to fit inside the slab. All of it, plus plug travel, plus the dust you cannot fully clear.
The published installation instruction gives two numbers: anchor length, and required hole depth. The second is larger. Mark the bit to the hole depth. Mark it to the anchor length instead and the anchor sits high, the plug drives into air, and the set is worthless.
Now the other direction. A hole deep enough to break through the underside leaves the working end with nothing to expand against. In a suspended slab that means a hole through the soffit, dust below, and an anchor holding a cone of concrete with a free face right under it.
Three slab types make that a live risk.
Thin toppings and screeds. A 50 mm topping over a structural slab is not an anchor base. The anchor will set. It will also leave with the topping.
Hollow-core planks. Voids run the length of the unit. A hole can open into one, and then the expansion presses on nothing.
Metal deck with concrete fill. Fill depth over a flute is often small. A flush anchor over a flute is an anchor in a thin plate of concrete.
Do the arithmetic before choosing a length. Slab thickness, minus cover, minus the hole depth margin. If the answer is negative, the drop-in anchor is the wrong product and no care at the drill will fix it.
One more cost, and this one shows on the finished floor. A flush set puts the setting blow at the surface, on a concrete rim a few millimetres wide. Over-drive it and the rim spalls. You get a crater, a loose anchor, and a patch job on a finished floor. A spalled edge around a flush anchor is one of the most photographed failures in this trade, and the concrete usually gets blamed.
Drop-in anchor against wedge, sleeve and screw anchor
Four products, four answers. They are not interchangeable, and the price gap is small enough that habit decides.
Habit is a poor engineer. Here is what separates them.
| Anchor | How it holds | What stays at the surface | Removable later | Main weak point |
|---|---|---|---|---|
| Drop-in | Internal plug opens a slotted tube against the hole wall | A thread, flush with the concrete | Yes, fully; bolt out, thread stays | Set once, no second chance; needs the tool and an accurate, clean hole |
| Wedge | Stud with a cone pulls an expansion clip into the wall | A stud and nut, standing proud | Nut and fixture yes; anchor stays | Clip sits at depth; over-torque shears the stud or spalls the surface |
| Sleeve | Full-length sleeve compresses and bears over a long length of hole | Stud, nut and sleeve shoulder | Nut and fixture yes; anchor stays | Bulky; deeper hole, more clearance needed |
| Screw anchor | Hardened thread cuts its own path into the concrete; no expansion | A hex head or small stud | Yes, and can be re-set in the same hole | Hole diameter is critical; a worn bit ruins the fit |
The wedge anchor is the site default, because everybody has one in the van. It suits through-fixture work: bracket on, nut on, torque it. Its clip sits below the surface, so depth and straightness still matter, but a small error shows up as reduced capacity rather than a scrapped anchor.
On capacity, do not generalise. For one diameter in the same concrete, the four types do not share a number, and the ranking can flip between tension and shear, and between cracked and uncracked concrete. Capacity comes from the published data for that specific anchor, diameter and base material. Anything else is a guess with a decimal point.
Edge distance, spacing, and the two cases where it is the wrong buy
Expansion pushes outward in every direction. Near a free edge, the concrete on one side is thin and the pressure has somewhere to go. What lets go is a cone of concrete, often with the anchor still perfectly set inside it.
Minimum edge distance and spacing come from the published data for that anchor and diameter. Not from half the embedment, which is a number that circulates on site and is wrong as often as right. Not from what the last job did.
Two anchors closer than the published spacing share a stress cone. Neither knows the other is there, and both lose capacity. A row of anchors along a wall base, spaced by eye, is the usual version of this. The drawing said 200 mm. The drill said 180 mm because rebar was in the way.
Then the bit stops on steel. The operator moves the hole. It is now closer to the edge, or closer to its neighbour, or both, and nobody records it. The anchor sets, the bolt goes in, and the connection sits outside the geometry the data assumed.
Now the two conditions that decide against this product outright.
Cracked concrete. The anchor works by pressing on the hole wall. In a crack, the wall is already two pieces. Expansion opens the crack instead of gripping it. Slabs on grade that move, tension zones, and any structure where cracking is expected need anchors qualified for cracked concrete. Under ACI 355.2 that is a defined test programme; under an ETA it is a specific assessment. A drop-in anchor offered for uncracked concrete does not become a cracked-concrete anchor because someone picked a longer one.
Overhead work. Setting one upside down is a bad job done badly. The plug can fall out of the tube before you strike it. Dust falls into your face and back down the hole. The blow has to be delivered upward, one-handed, from a ladder, with the tool balanced on a rim a few millimetres wide. The anchor tips. The plug goes in crooked. Nobody sees it afterwards, because it is above their head and flush with the soffit.
For ceilings carrying real load, look at a wedge anchor, a screw anchor with a published overhead rating, or a bonded anchor. All three give a straighter installation path.
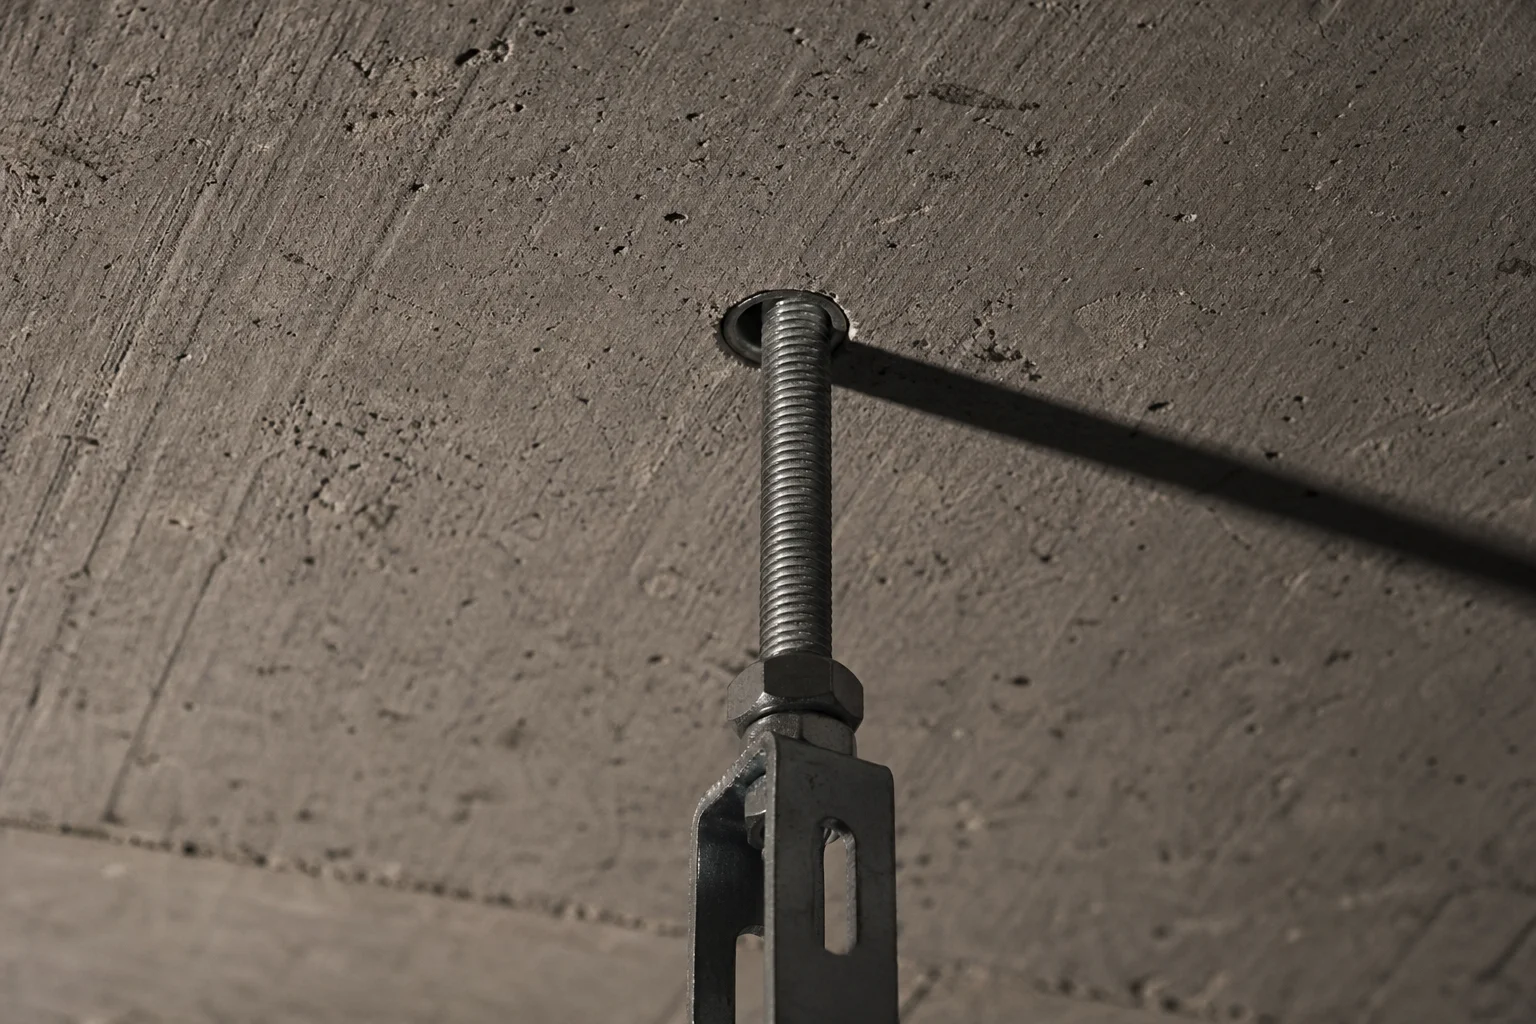
Set flush in a slab. Nothing protrudes, nothing can be inspected from above, and the whole connection rests on a hole that was drilled and cleaned properly.
The rod, the thread, and what happens when it bottoms out
The drop-in anchor is a socket. It holds nothing on its own. Capacity belongs to the system: anchor, rod, concrete.
So the rod is not an afterthought. A grade 4.8 piece of all-thread in a good anchor gives a joint that yields at the rod. A stainless rod in a zinc-plated anchor in a wet plant gives a galvanic couple, and the anchor is the anode and the part you cannot replace.
Engagement is next. The rod has to thread in far enough to develop what the anchor can carry. Too little and the threads strip, or the rod pulls out with the anchor intact. The published instruction states the minimum engagement. Use it.
Now the failure that catches experienced hands. The rod bottoms out.
Inside the anchor, the setting plug sits at the base of the bore. A rod too long, a hole too shallow, or a plug driven deeper than it should be all produce the same result: the rod reaches the plug before the fixture is clamped.
The wrench goes tight. The installer stops. The bracket is still loose, and the gap gets taken up by a washer stack nobody documented. Months later the connection rattles and the anchor takes the blame.
Worse: keep turning and the rod jacks the anchor up the hole. The expansion that held it now works in reverse. The anchor rises, the concrete around it cracks, and the fixing comes out on the end of the bolt. That one is unmistakable in the hand and very hard to explain in a report.
Two habits prevent both. Know the usable thread depth, measured on a sample, and put the maximum rod length on the drawing. And never use the rod to set the anchor: threading a bolt in and hammering the head drives the plug unevenly with no depth control.
There is also what people put in the hole. The thread is an ordinary M-thread, so anything with a matching thread will start: a set screw, a length of all-thread with a burr on the end, a bolt from a mixed box with no grade mark. Each is a decision about the joint, made at the van by whoever was closest.
That is why anchor supply and fastener supply belong in one conversation. A supplier running both can say which rod grade matches the anchor and which coating matches the environment, instead of shipping two boxes that were never designed to meet.
Hole tolerance, drill size and the bit that has done too much work
The hole is the female half of the fastener. Everything the anchor does, it does against that surface.
Start with diameter. Use the size in the published instruction for that anchor and that diameter. Not the nearest imperial bit. Not what worked on another brand. Not the next size up because the anchor was tight last time.
Then look at the bit. Masonry bits wear. A worn bit cuts under size at the tip and over size along the flutes, so the hole ends up tapered and slightly large. An SDS bit cuts a little over nominal even when new, because of runout and the hammer action. The published drill size allows for that. It does not allow for four hundred holes.
Oversize, and the plug travels further before it bites. It may reach the end of its travel with the walls barely loaded. Undersize, and the anchor will not enter, or enters with the plug part-driven, or splits the concrete as the walls open. Neither is visible from the surface.
Depth is the third number. Mark the bit at the hole depth, not the anchor length, and drill to the mark every time, including the last hole of the day.
Cleaning is the fourth, and it is where most failures live. Dust is a compressible layer between anchor and concrete. The plug drives in, the dust packs, the anchor feels set, and wall pressure is a fraction of what it should be. A blow-out pump and a stiff brush are not optional steps. They are the installation.
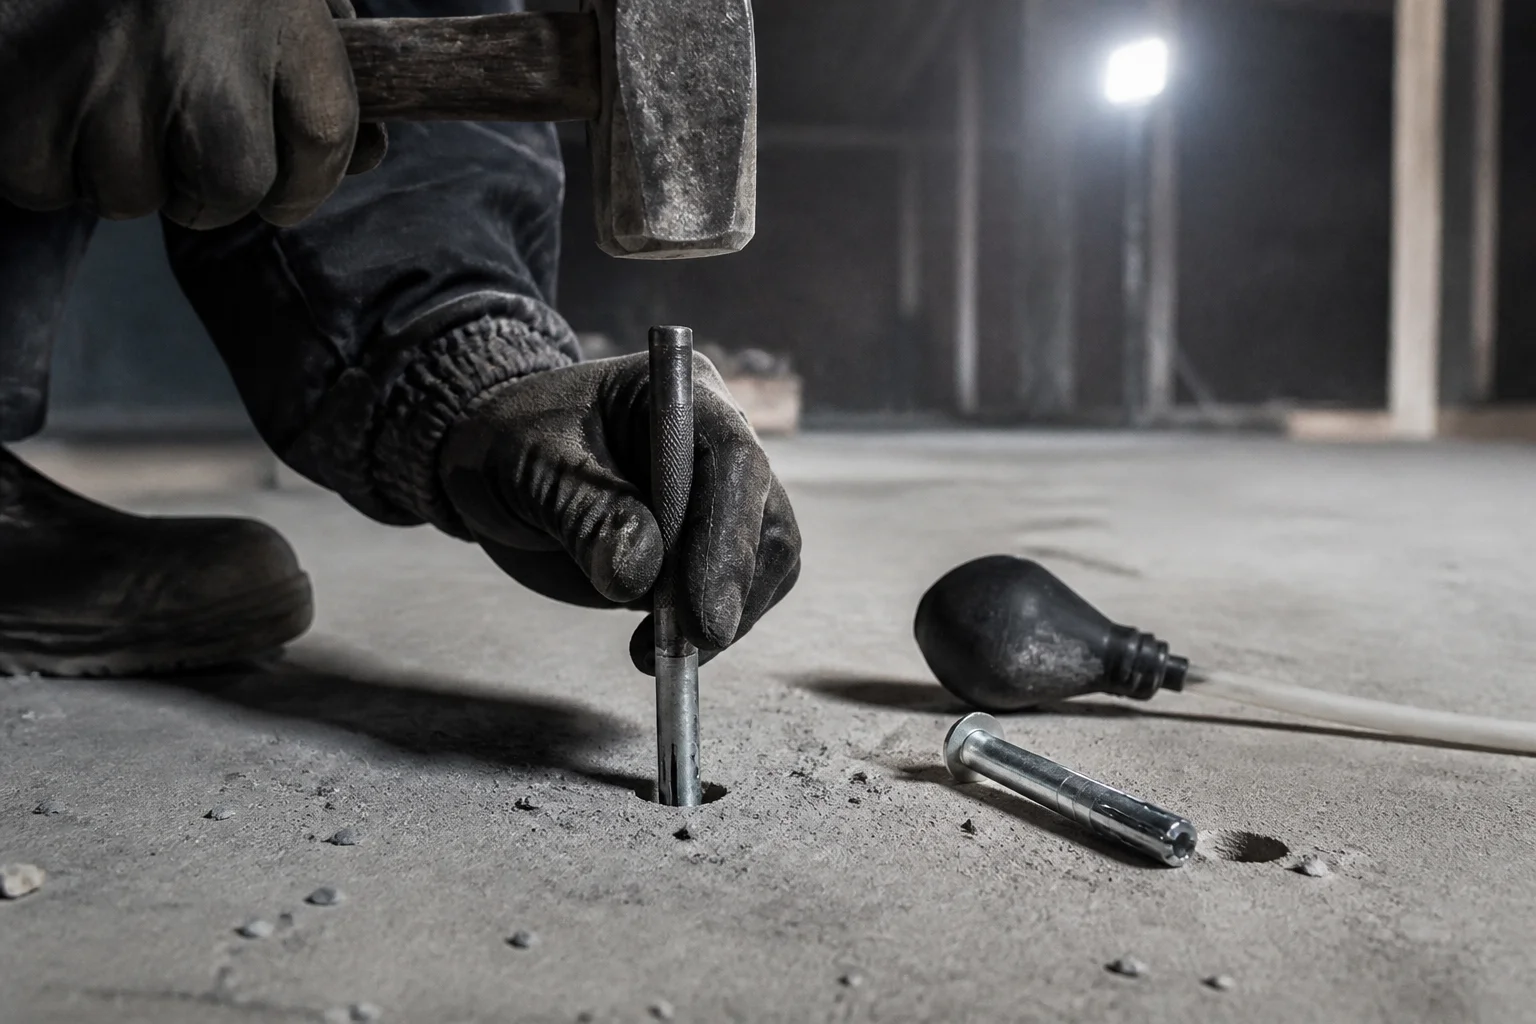
Setting the plug with the matching tool. The shoulder stops the plug at the right depth, and the pin keeps the blow on the anchor axis instead of on the thread.
Which variables move the number? Nobody should quote capacity from an article, and this one will not. What follows is the list of things that change it, and which of them your drawing has already fixed.
| Variable | What it changes | Who decides it |
|---|---|---|
| Base material and strength | Sets the ceiling for every mechanism and changes which failure mode governs | Design, confirmed by the pour |
| Embedment depth | More concrete in the resistance; shallower moves failure toward pull-out | Product length and hole depth; the driller can destroy it |
| Edge distance | Short distance lets a cone break out sideways instead of failing in the anchor | Layout drawing, then whoever relocates a hole |
| Anchor spacing | Close anchors share one cone, so the group carries less than the sum | Layout drawing |
| Hole diameter and straightness | Sets how far the plug travels before the walls load, and how evenly | Drill size, bit condition, technique |
| Hole cleaning | Dust and slurry cushion the wall; the anchor reads set and carries little | The installer, with a pump and brush |
| Cracked or uncracked | A crack removes the wall the anchor presses against; the qualified value is a different number | Structural design and anchor qualification |
| Rod grade and engagement | Moves failure into the steel, or into the thread if engagement is short | Buyer, usually too late |
The design fixes four of those on paper. The drill fixes the rest in an afternoon. The anchor is not unreliable. It has more ways to go wrong than most, and almost none leave evidence.
The specification fields that decide a quotation
Most anchor quotations compare on price and fail to compare on scope. Two offers for "10 mm drop-in anchors" can describe different lengths, different steels, different coatings, and only one includes a setting tool.
The fix is a list, filled in once and reused for every source.
| Field | What to put in the enquiry | Why it changes the answer |
|---|---|---|
| Anchor type and standard | Drop-in, with product standard or drawing reference | Two suppliers can both say "drop-in" and mean different slot geometry |
| Internal thread | Metric or inch size, tolerance class if critical | The thread is the product; the outside diameter follows |
| Length and embedment | Overall length, hole depth, minimum engagement | Length is what fits the slab; engagement is what the rod needs |
| Base material and strength | Concrete or masonry, with the specified strength class | Decides which product family is qualified at all |
| Crack state | Cracked or uncracked, and whether it sits in a tension zone | A different qualification route and data set |
| Slab thickness | Thickness, topping, hollow-core, deck fill, soffit access | Rules out flush anchors before anyone quotes them |
| Edge distance and spacing | As drawn, plus what the site may do when it hits rebar | Sets the layout constraint the supplier must work inside |
| Drill size and method | Published drill size, hammer or core, wet or dry | Some anchors are qualified for one method only |
| Cleaning and tools | Pump, brush, setting tools by size and quantity | A tool shortfall on site becomes a punch on site |
| Rod or bolt | Grade, length, coating, supplied or site-supplied | The joint fails at the weakest part, often the rod |
| Coating and environment | Zinc, hot-dip, stainless; indoor, coastal, wash-down | A buried anchor cannot be re-coated later |
| Evidence required | Which qualification and which installation instruction | Turns a claim into a document with a number on it |
Two fields get left blank most often. The first is the setting tool: ask whether it is included, how many, and whether each diameter has its own. The second is evidence. For structural work the framework is ACI 355.2 for qualification of post-installed mechanical anchors, with design to ACI 318 Chapter 17. In Europe it is an ETA. Ask which of those covers the exact product, diameter and base material.
Then read the anchor's own published installation instructions. They are short, and they answer most of this article for one product: drill size, hole depth, cleaning sequence, setting tool, engagement, edge distance, spacing. Where the wider selection logic sits is set out in our concrete anchor manufacturer guide. For the enquiry itself, the structure in our note on writing a custom fastener RFQ applies to anchors with little change.
Questions buyers actually ask about drop-in anchors
Can I set a drop-in anchor with a hammer and a punch?
You can, and it happens every day. It is also the most common reason an anchor holds less than the drawing assumes. A punch has no shoulder to stop the plug at depth and no guide to keep the blow on axis. Buy the setting tool for each diameter.
How deep does it need to be embedded?
As deep as the published instruction says for that anchor, and no shallower. Hole depth is a different number from anchor length, and it is the larger of the two. Mark the bit to the hole depth.
Is it suitable for a ceiling?
Usually not the first choice. The plug can fall out before it is struck, dust drops back into the hole, and the blow is awkward to deliver straight. Overhead fixings also get inspected less often than floor fixings.
What happens if the hole is drilled too large?
The plug travels further before the tube walls touch concrete. It may finish its travel with very little pressure on the wall. The anchor feels set, takes the bolt, and carries a fraction of the published capacity. No visible sign.
Can a drop-in anchor be removed and used again?
No. Once the plug is driven, the tube is expanded and the anchor is part of the slab. Taking it out destroys the hole. The rod comes out and goes back in as often as you like, but the anchor is single-use.
How much torque should the bolt get?
Whatever the published data says for that anchor, diameter and base material. It is an installation value, not a way to gain capacity. Over-torque can spin the anchor, strip the thread, or jack the fixing upward.
Can it be used in cracked concrete?
Only if that specific anchor is qualified for cracked concrete. It holds by pressing on the hole wall, and a crack means the wall is already broken. An anchor qualified for uncracked concrete does not inherit the cracked rating.
Buy the anchor that fits the hole you can actually drill
A drop-in anchor is a good product in the right place. Flush finish, removable bolt, nothing to trip over. On a machinery base in a thick slab, set with the right tool into a clean hole, it does what the drawing asks.
The trouble is that it gets specified by habit, in places where a screw anchor would be more forgiving and a wedge anchor more predictable. Thin slabs. Ceilings. Cracked concrete. Holes drilled by someone with a worn bit and no depth mark.
So the decision comes down to four questions. Is the slab thick enough for the full embedment? Is the concrete uncracked, or is the anchor qualified for cracks? Can the crew set it with the right tool, in that orientation? Will the hole be drilled and cleaned to the published numbers?
Four yeses and it is a sensible buy. Any no, and a different anchor is the cheaper decision, even at a higher part price.
JingleFix supplies anchors and fasteners from Ningbo, with drawing-based and sample-based customization and inspection documentation agreed per order. Twelve years of export experience. Our concrete anchors range covers drop-in, wedge, sleeve and screw types, and we will say when one of them is wrong for your slab.
Send the drawing, the base material, the slab thickness and the quantity. We reply with anchor type, diameter, length, setting tool and the evidence we can provide for that specific part.
Send Your Inquiry Now →Or email sales@jinglefix.com · WhatsApp +86 13958236696