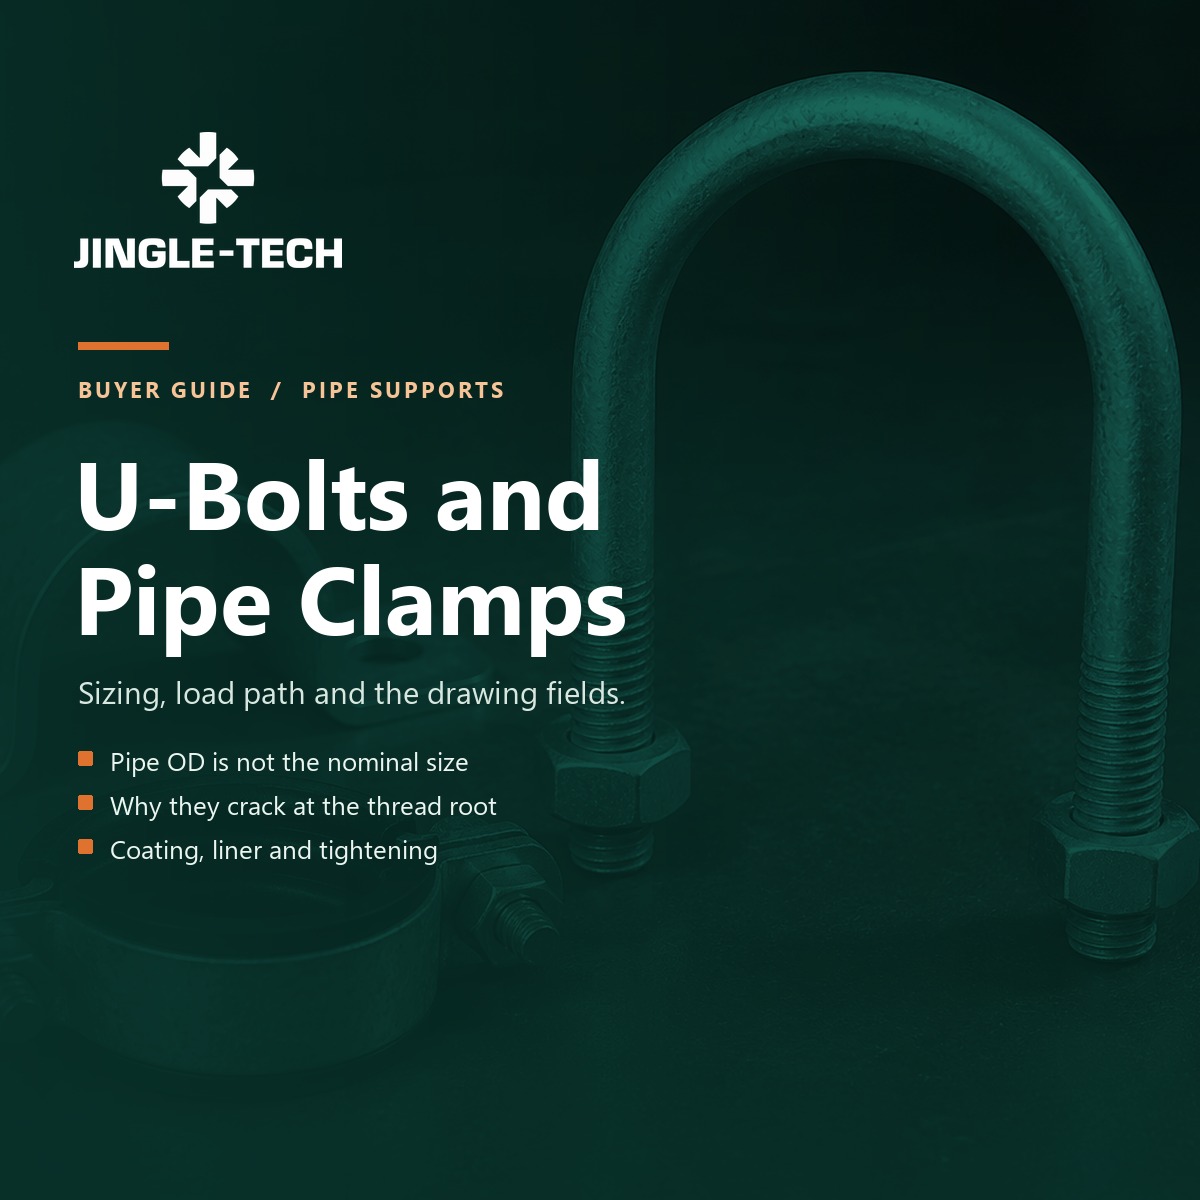
U-Bolt and Pipe Clamp: Sizing, Load Path and What to Put on the Drawing
A U-bolt costs less than the freight that carries it. That is the root of most of the trouble it causes.
It looks like a bent rod with two nuts. Nothing suggests engineering. So it gets bought the way a washer gets bought. By size. By eye. By whatever the last project used.
Then the pipe grooves where the clamp sat. Or the clamp goes slack after one season. Or a leg cracks at the thread root on a line that ran for two years without a complaint.
This guide is about specifying a U-bolt and pipe clamp assembly so none of that happens. It covers the dimension that actually matters, the load path the part belongs to, the reason these parts crack, coatings that survive weather, and the tightening question nobody writes down.
It ends with the drawing fields that make two quotations comparable. Fill them in, and you are comparing the same product. Leave them out, and you are comparing two prices for two different things.
One line worth keeping: the cheapest clamp is the one that lets the pipe move quietly for two years.
Four parts, one catalogue word
"Pipe clamp" covers at least four products with different jobs. Buyers use the phrase for all of them. Suppliers quote whichever one is nearest the door.
A plain U-bolt is a bent rod with two threaded legs. It pulls the pipe against a support. A rubber-lined U-bolt is the same part with a liner bonded or slipped over the saddle, so the steel never touches the pipe coating. A saddle clamp is a shaped seat with a strap or a top plate. A riser clamp carries vertical pipe by gripping below a flange or a weld collar, and it is not really holding the pipe against a surface at all.
Those four do not share a load path, a failure mode or a price. Choosing between them is the first real decision in the specification, and it comes before size.
| Type | How it contacts the pipe | Load it resists | Fits | Failure mode to watch |
|---|---|---|---|---|
| Plain U-bolt | Two line contacts, bare steel on pipe or on coating | Holds the pipe down and against movement; little axial restraint | Bare steel pipe, painted pipe, indoor runs, short spans | Coating cut at the contact line, then corrosion under the clamp |
| Rubber-lined U-bolt | Liner conforms over a wider arc of the pipe | Same as plain, plus vibration damping and electrical isolation | Coated pipe, plastic pipe, thin wall, chilled and process lines | Liner creep and compression set; clamp reads tight but the joint relaxes |
| Saddle clamp | Shaped seat under the pipe, strap or top plate over it | Vertical load with a defined bearing area; some axial grip by friction | Insulated lines, large diameters, supports with wear pads | Strap fretting against the seat; seat out of square with the pipe axis |
| Riser clamp | Grips the pipe wall below a flange, collar or weld bead | Vertical pipe weight, carried in bearing rather than friction | Vertical risers through floors, shafts and roof penetrations | Bearing on a thin collar; local distortion of the riser wall |
Read the third column again. A U-bolt is a hold-down, not a restraint. It stops the pipe lifting off a support and it resists some sliding through friction. It does not anchor a line against thermal growth. If the drawing needs a fixed point, the part is a different part.
That distinction gets lost in catalogue language. A buyer searching for a U-bolt and pipe clamp to restrain a hot line often needs an anchor shoe, a guide or a riser clamp. The U-bolt gets installed anyway because it arrived first. Then it gets blamed.
A U-bolt and pipe clamp order that starts with a type usually ends well. One that starts with a size usually does not.
Pipe outside diameter is the only dimension the clamp touches
DN50 is not a size you can order a U-bolt against. It is a label. A round number chosen for convenience. The clamp contacts the outside surface, and the clamp has to be built around that surface.
So the first line of any enquiry is the measured outside diameter. Not the nominal size. Not the schedule. Not "2 inch".
Take a tape measure or a caliper to the pipe. Wrap a strip of paper around it if the pipe is large, mark the overlap, lay the strip flat and divide by pi. That trick gets you within a fraction of a millimetre without a diameter tape, and it works on a pipe that is already lagged.
For steel and ductile iron, DN and NPS lines up well enough to be predictable. DN50 and NPS 2 both come out at 60.3 mm. DN100 and NPS 4 both come out at 114.3 mm. Wall thickness changes with schedule and does not change the outside diameter at all.
That last point is where thin-wall pipe gets crushed. A DN50 line in a heavy schedule has a stiff wall. The same DN50 in a light schedule has a wall that a determined installer can ovalise with a spanner. The clamp does not know the difference. The pipe does.
Other materials break the pattern entirely. Polyethylene pipe is often labelled by outside diameter in millimetres, so a DN50 PE pipe may measure close to 50 mm. Copper tube is labelled by a nominal size that no longer matches its outside diameter in the larger sizes. Stainless tube may be sold on an ISO tube outside diameter that matches nothing in the steel pipe table.
Which is why "DN50 U-bolt" is a sentence that should stop a conversation. It names a bore. The clamp needs a circumference.
| Nominal label | Outside diameter, steel pipe | Wall note | What the drawing must state | Bolt thread, typical |
|---|---|---|---|---|
| DN25 / NPS 1 | 33.7 mm | Schedule does not change OD | Measured OD, wall thickness, pipe material | M6 to M8 |
| DN50 / NPS 2 | 60.3 mm | Light wall needs a wider saddle or liner | Measured OD, plus liner thickness if specified | M8 to M10 |
| DN80 / NPS 3 | 88.9 mm | Insulation changes the clamp, not the pipe | OD over insulation, and whether the clamp bears on it | M10 to M12 |
| DN100 / NPS 4 | 114.3 mm | Heavier legs and a wider bearing area | OD, support spacing, and structure the clamp bolts to | M12 to M16 |
| DN150 / NPS 6 | 168.3 mm | Two-leg U-bolts deform the pipe if pulled hard | OD, and whether a saddle clamp replaces the U-bolt | M16 to M20 |
| Any plastic or tube size | Measure it; do not convert it | Wall may be soft enough to deflect by hand | OD, wall, material, and maximum permitted clamp pressure | Set by the pipe, not by the bolt |
The last column is a starting range, not a rule. The governing dimensions are inside width and leg diameter, and those come from a standard or from your drawing.
DIN 3570 is the reference most European U-bolt catalogues are built on. It fixes inside width, inside height, thread length and leg diameter against pipe outside diameter. If a supplier quotes "DIN 3570 for 60.3 mm", you have something to inspect. If a supplier quotes "2 inch U-bolt", you have a conversation.
Thread length and leg length are separate decisions
Two numbers get confused constantly. Leg length is how far the bent rod reaches. Thread length is how much of that leg carries a thread.
You need enough thread for the nut, the washer, the support thickness and a few millimetres left showing. Not more. Extra thread is where corrosion starts and where the leg is weakest.
Work the stack backwards from the structure. Support flange or channel thickness. Washer. Nut. Spring washer if the drawing calls for one. That total, plus two or three exposed threads, is your minimum. Then check the figure against the leg length the catalogue offers.
Most field failures of the "won't fit" kind are not about width. They are about a leg that is 10 mm too short because nobody added the channel depth to the stack.
The other extreme is just as common. A 200 mm leg bought for a 60 mm stack leaves 140 mm of thread hanging in the weather. That thread is a fatigue notch, a corrosion site and a snag hazard. It also looks like a mistake, because it is one.
A short, well-chosen thread keeps the nut close to the support and cuts the bending the leg sees. It costs nothing. It just has to be on the drawing.
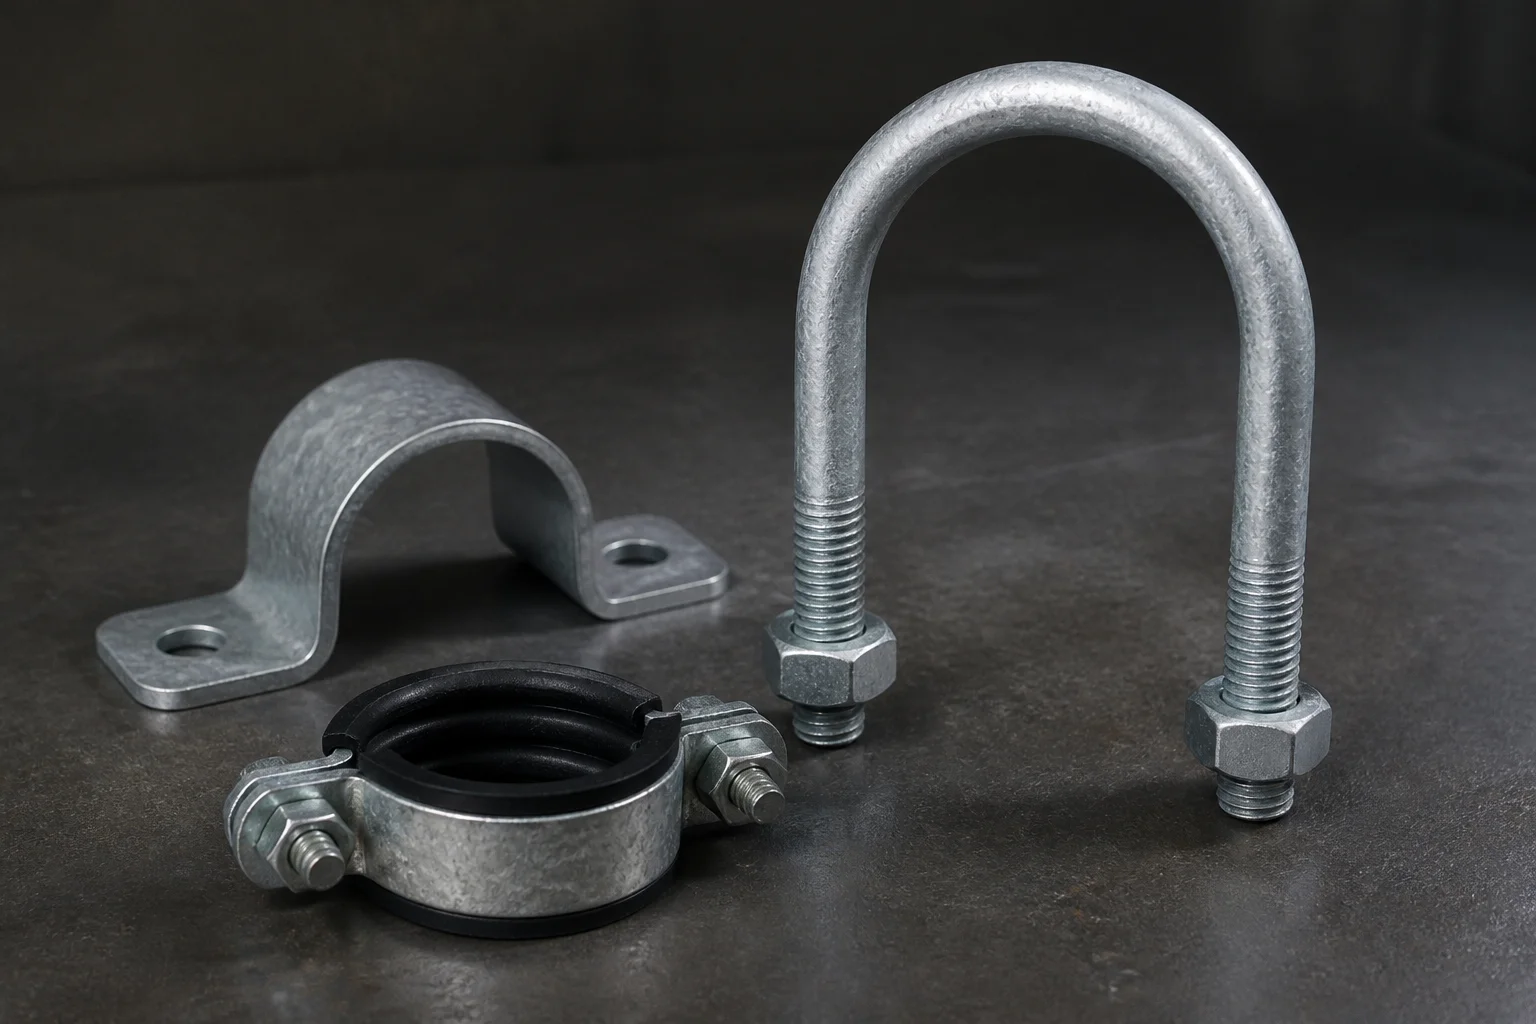
Galvanized U-bolts and pipe clamps in a few pipe sizes. The inside width, leg length and thread length are three separate numbers, and only one of them is the pipe size.
The load path runs from pipe to structure
Draw the load path before choosing a clamp. It starts at the pipe wall and ends at whatever carries the steel.
Pipe wall. Liner or saddle. U-bolt legs. Nuts bearing on the support. Support steel. Then the structure behind it.
Every one of those is a place where the path can be broken. A liner that creeps. A leg that bears on a hole edge instead of a flat face. A support that was never designed for a point load.
Two load directions matter. Downward load is gravity plus whatever the line carries, and the clamp passes it into the support through bearing and friction. Lateral load is movement, vibration, water hammer, wind on an outdoor run.
The U-bolt handles the first well and the second poorly. Its grip on the pipe comes from friction between two line contacts and the pipe surface. Two line contacts is a small area. Change the surface, and the grip changes.
A painted pipe and a bare pipe do not behave the same in the same clamp. Paint is a low-friction layer that also creeps. A clamp tightened on paint loses preload as the film thins.
Where the support is concrete rather than steel, the path continues into a fixing. A cast-in or drilled concrete anchor takes over at that point, and its own rules apply. Edge distance, embedment and hole cleaning decide whether the clamp ever sees the load it was sized for. A perfect U-bolt on a loose anchor is a loose clamp with good paperwork.
Pipe movement deserves its own line. A line that runs hot grows. A line that carries chilled water contracts. If the clamp is allowed to slide, the pipe walks along the support and wears both surfaces. If it is not allowed to slide, the movement goes into the pipe wall or the support.
MSS SP-58 covers pipe hangers and supports as a product family, including materials and manufacture. It is the right reference for the support hardware around the clamp. It is not a substitute for a project stress analysis, and no supplier should pretend otherwise.
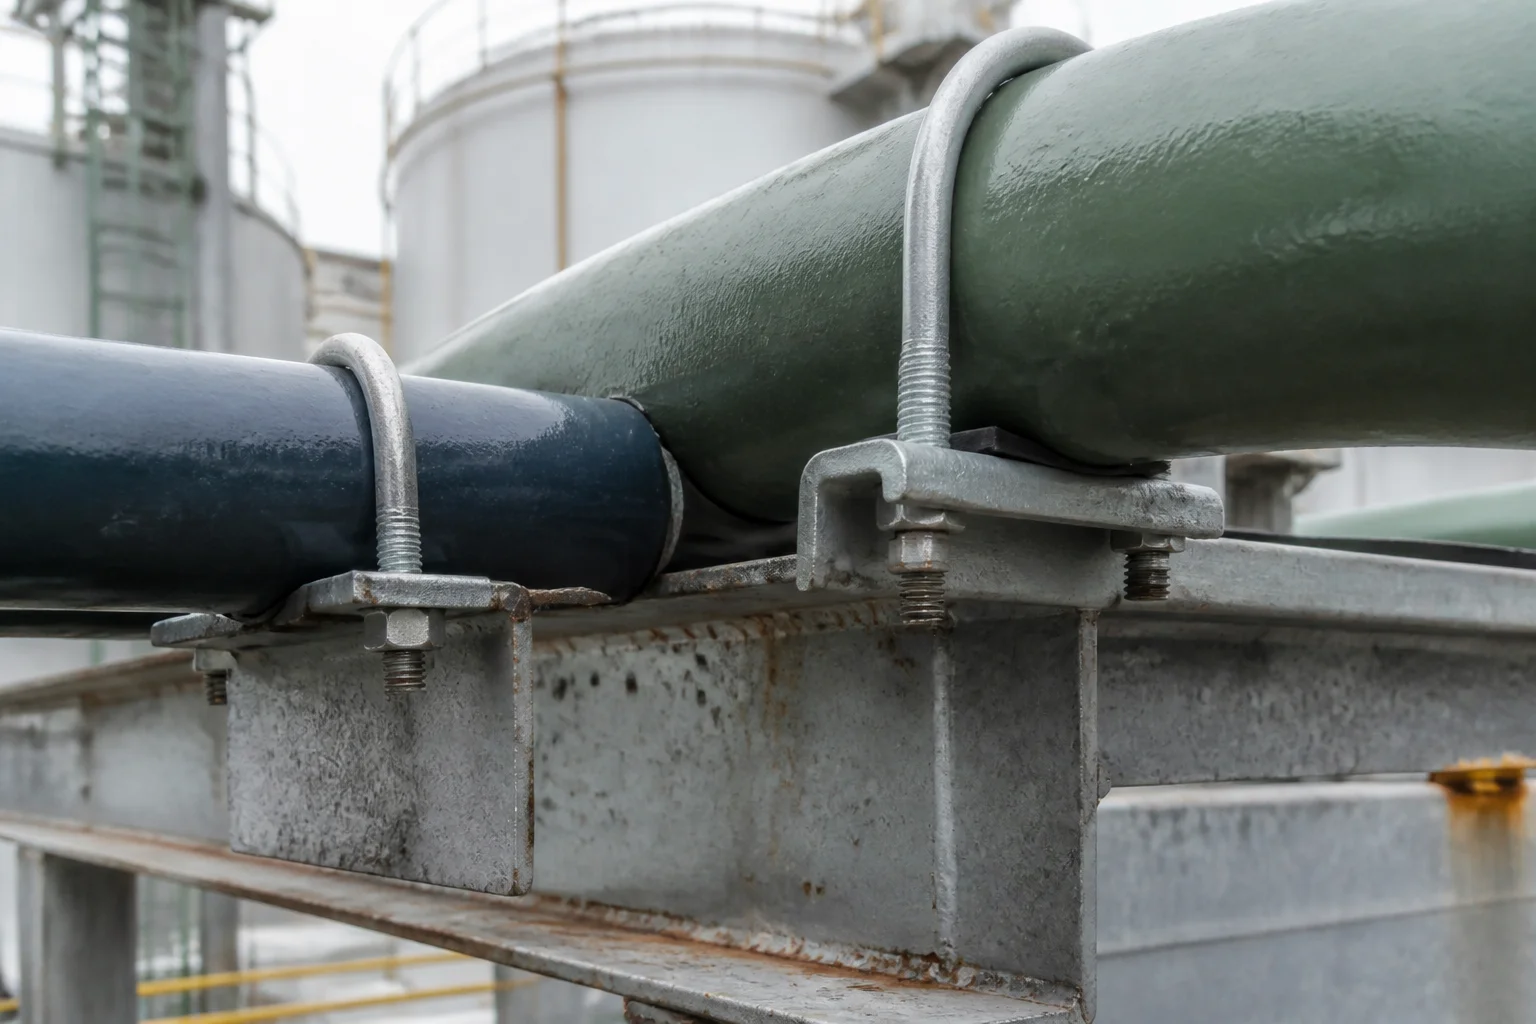
A pipe run clamped to a steel support. The load goes pipe wall, liner, legs, nuts, support. Any gap in that chain is where the movement starts.
U-bolts crack at the thread root, not in the bend
Everyone expects the bend to fail. It almost never does. The bend has more material and a generous radius. The thread root has the smallest section on the part and a sharp change in geometry right where the stress lands.
Three things meet at that point. The thread root is a notch. The first engaged thread carries more load than the ones behind it. And the leg is in bending, not pure tension, because the two legs are pulled toward each other and the pipe pushes back.
Add vibration and you have a fatigue machine that runs every time the pump starts.
Failure usually starts on the inside of the leg, at the first or second engaged thread, and works around the section over months. The fracture face has a smooth region and a rough one. The smooth region is the part that grew slowly. The rough one is the last turn of the nut.
What moves the odds is unglamorous. Roll the thread instead of cutting it, because rolling keeps the grain along the contour and leaves the surface in compression. Keep the nut close to the support, so the unbraced span stays short. Tighten both legs evenly. Use a washer that does not dish.
Grade matters, but it is not a substitute for geometry. ASTM A307 covers a general-purpose carbon steel bolt grade used widely for routine clamping. ASTM A193 covers higher-strength and high-temperature bolting, with B7 as the grade most buyers recognise. ASTM A563 covers nuts and their grades, which is the half of the assembly that gets forgotten.
One warning belongs here. A harder U-bolt does not fix a clamp that is being pulled into a soft pipe. It just moves the damage from the rod to the tube.
Coating: read the thread, not the box
Hot-dip galvanizing per ISO 10684 or ASTM F2329 builds a zinc-iron layer that is thick, tough and hostile to a nut. The coating does not go on evenly. It builds at edges and corners. On a thread, the crest takes more zinc than the root.
That is why galvanized U-bolts normally ship with overtapped nuts, or with a thread that has been cut slightly undersize before coating. The assembly has to be able to turn after the zinc is on. A buyer who specifies "hot-dip galvanized" without knowing that will one day receive a clamp whose nuts will not start.
Run a fingernail along the thread of a sample. A lumpy coating means a stiff assembly. A thin one on a coastal job means the opposite problem.
For outdoor and coastal service, the choice usually sits between hot-dip galvanizing, zinc flake, and stainless. Hot-dip gives the most zinc for the money and the longest life on a thick section. Zinc flake gives a thin, uniform layer that keeps threads workable. Stainless removes the coating question and introduces galling, where nut and bolt seize during assembly.
Stainless also brings a galvanic couple. A stainless U-bolt on a galvanized support, in wet conditions, makes the support the anode. The clamp survives. The support does not.
Coating thickness also changes what the torque wrench is doing, because a dry galvanized thread has different friction from a plated one. The full argument is in our note on hot-dip galvanized fasteners, and it applies to clamps exactly as it applies to structural bolts.
Rubber-lined or plain saddle
The liner does four jobs, and buyers usually only count one of them.
It protects the pipe coating. It spreads the contact over an arc instead of two lines. It damps vibration. And it separates two dissimilar metals, which stops a galvanic cell at the contact point.
It also introduces a material that creeps. Rubber and elastomer liners compress under load and keep compressing for weeks. A clamp torqued correctly on Monday reads loose in three weeks, and the nuts have not moved. The liner has.
That behaviour is not a fault. It is the reason a lined clamp often needs a re-tightening step after the line goes into service. Write that step into the installation instruction, or the site will discover it as a leak or a rattle.
Material choice matters more than most specifications admit. EPDM handles weather and hot water well. Nitrile handles oil. Neoprene sits between them. None of them enjoys a hot, oily, outdoor combination for long.
Bonded or loose is the next question. A bonded liner cannot be lost on site. A loose liner is easier to replace and easier to install wrong.
Thin-wall pipe is where the choice becomes structural. On a light schedule, a plain U-bolt pulled hard will ovalise the pipe before it grips. A liner spreads that load and buys some margin. It does not create wall thickness, and no liner fixes a clamp that is simply too tight.
Tightening: clamp load against pipe deformation
Here is the uncomfortable part. A U-bolt has no published preload target in the way a structural bolt does. What it has is a pipe to squeeze, and the pipe is the softest thing in the joint.
So tightening is a balance. Enough clamp load to hold the pipe against movement. Not enough to deform it. This is where a U-bolt and pipe clamp choice stops being paperwork and becomes visible on site.
The method matters more than the number. Run both nuts down by hand until the clamp seats. Then tighten in small increments, alternating legs, watching the gap close evenly. A clamp pulled down on one side first walks off centre, and the pipe ends up loaded on one line instead of two.
Use a torque wrench on both legs, not a ratchet and judgement. A torque wrench stops at a value you chose. The value should come from the clamp supplier, the pipe supplier, or the project specification, and it belongs on the drawing as an installation note rather than a hope.
Watch the pipe while you tighten, not the wrench. A round pipe that starts to look oval has already been taken past its limit. A liner that bulges out from under the clamp has been compressed too far. Either is a stop signal.
Thread condition changes what a given torque delivers. A dry, hot-dip galvanized thread absorbs more of the effort in friction, so less of it reaches clamp load. A lubricated thread delivers more clamp load at the same setting, which is exactly when a pipe gets crushed by a careful operator following the wrong table. The relationship is the one covered in bolt torque and clamp load, and it applies to a bent rod as much as to a structural bolt.
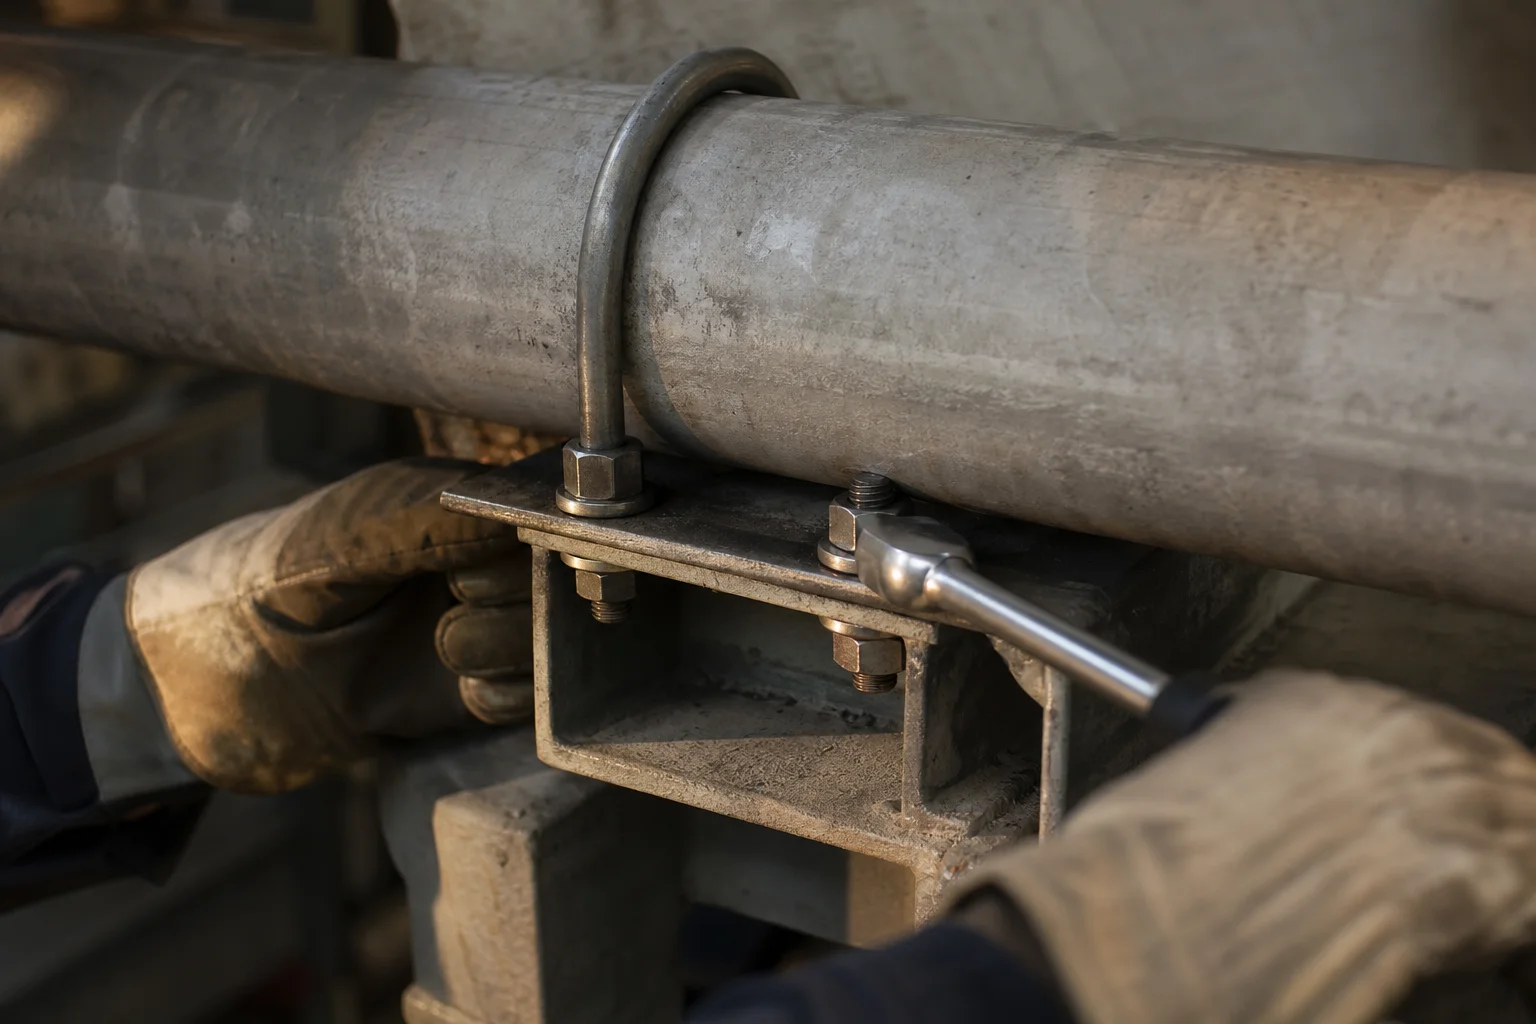
Tightening a U-bolt with a torque wrench, liner visible under the clamp. Both legs, small increments, and a look at the pipe between passes.
The drawing fields that make two quotations comparable
A clamp drawing with only a pipe size on it produces quotes that cannot be compared. One supplier prices a bare U-bolt. Another prices a lined assembly with galvanized hardware. Both are "correct" against the drawing.
Fill in the fields below and the ambiguity disappears. It takes ten minutes and it saves a shipping container of argument.
| Field | What to state | Why it changes the quote |
|---|---|---|
| Pipe outside diameter | Measured OD in mm, with the tolerance you will accept | Sets the bending radius, inside width and tooling |
| Pipe material and wall | Steel, stainless, plastic; schedule or wall thickness in mm | Decides whether a liner is needed and how much clamp load is safe |
| Clamp type | Plain U-bolt, lined U-bolt, saddle clamp, riser clamp | Different part, different process, different price |
| Thread and leg length | Thread length, leg length, or the DIN 3570 size you want | Changes cut length, thread run and material use |
| Thread and grade | Metric or inch, thread size, property class under ISO 898-1 or the ASTM grade | Sets raw material and any heat treatment |
| Coating | Standard and thickness, plus whether nuts are overtapped | Hot-dip, zinc flake and stainless are different supply chains |
| Liner | Material, hardness, thickness, bonded or loose | Adds a second material and a bonding step |
| Installation torque | Value, unit, and the condition it applies to | Tells the supplier which thread condition you expect |
| Environment | Indoor, outdoor, coastal, chemical, temperature range | Drives coating and liner choice, and any test request |
| Evidence | Material certificate, coating thickness, dimensional report, sample | Documentation is priced, whether or not anyone reads it |
| Packing and marking | Bag quantity, size marking on the part, carton label | Mixed sizes in one bag is the most common site complaint |
A sample settles more than a paragraph. Ask for one clamp in the exact size and coating before the production run. Measure the inside width with a caliper. Thread a nut on by hand. Put it on a piece of the real pipe. That five-minute check catches more than a certificate.
Our own RFQ template follows the same logic for fasteners generally, and it works unchanged for clamps: how to write a custom fastener RFQ.
Questions buyers ask about U-bolts and clamps
Can I order a U-bolt by DN size alone?
No. DN is a nominal bore label, not a dimension you can build to. The clamp contacts the outside surface, so the outside diameter is the only number that works. Measure the pipe and put that figure on the enquiry.
How do I measure pipe diameter on site?
Use a caliper on the bare pipe, or wrap a strip of paper around it, mark the overlap and divide the flat length by pi. Remove lagging at one point rather than estimating through it.
Why do the nuts on my U-bolt not start?
Usually coating thickness on the thread, or a thread that was never overtapped after hot-dip galvanizing. Debris from blasting does the same. Check a sample by hand before the shipment leaves, not after it arrives.
Should I use a rubber-lined clamp or a plain one?
Use a liner when the pipe is coated, plastic, thin wall or vibration-prone. Use plain steel on bare heavy-wall pipe where a wide bearing area is not needed. Lined clamps relax over time, so plan a re-tightening step after commissioning.
How tight should a U-bolt be?
Enough to stop movement, not enough to change the shape of the pipe. Tighten both legs in small increments with a torque wrench, using a value agreed for that clamp and pipe. Watch the pipe for ovality while you work.
Galvanized or stainless for coastal service?
Hot-dip galvanizing per ISO 10684 or ASTM F2329 is the usual choice for carbon steel clamps outdoors. Stainless lasts longer in salt air but seizes during assembly and can drive a galvanic couple with a galvanized support. Match the clamp to what it touches.
What is the difference between a U-bolt and a saddle clamp?
A U-bolt holds the pipe down at two line contacts and relies on friction for any axial grip. A saddle clamp carries the pipe on a shaped seat with a defined bearing area. The second is better for insulated lines and large diameters.
The questions repeat because the mistakes repeat. A U-bolt and pipe clamp assembly fails for boring reasons. Wrong diameter. Short leg. Coating too thick for the nut. Liner that compressed after commissioning. A clamp pulled down on one leg until the pipe went oval.
None of those is a material problem. All of them are missing information.
The parts are simple, and that is precisely why nobody specifies them. The order goes out as a size, the supplier guesses the rest, and the site makes it fit. It usually does fit, for a while.
Ten fields on a drawing fix most of it. Outside diameter. Wall. Type. Thread and leg length. Grade. Coating with its standard. Liner material. Installation torque. Environment. Evidence.
JingleFix supplies clamps, fasteners and machined parts from Ningbo, with drawing-based and sample-based customization. Twelve years of export experience. We would rather ask what the pipe is and where it runs than quote a size and hope.
Send the pipe measurement and the support detail. We will tell you what is missing before anyone prices it. Start with the clamp range at pipe clamps and U-bolts, or send the drawing straight through.
Send the pipe size, not just the part name
Measured outside diameter, wall, clamp type, coating and quantity. We reply with the size, the material and the documentation we can provide for that specific clamp.
Send Your Inquiry Now →Or email sales@jinglefix.com · WhatsApp +86 13958236696